Redis安装
3台服务器安装Redis6.2.6 官网 中文 Redis安装包解压完成后,详细安装目录可以查看README.md
bash
# 1. 安装gcc
yum install gcc
# 2. 下载安装包
wget https://download.redis.io/releases/redis-6.2.6.tar.gz
tar -xf redis-6.2.6.tar.gz
# 3. 编译
cd redis-6.2.6 && make
cd src && make install PREFIX=/usr/local/redis
# 4. 配置环境变量
vi /etc/profile
# 添加环境变量
export REDIS_HOME=/usr/local/redis
export PATH=$PATH:$REDIS_HOME/bin

source /etc/profile
# 5. 根据Redis官方提供的脚本一键安装
cd ../../redis-6.2.6/utils
./install_server.sh
运行第5步报错,错误信息如下:

注释掉install_server.sh 中报错部分后重新执行install_server.sh

bash
# 可执行多次。物理机中可以有多个Redis实例,通过port区分
./install_server.sh
# 根据提示内容按需修改,不修改直接回车确认
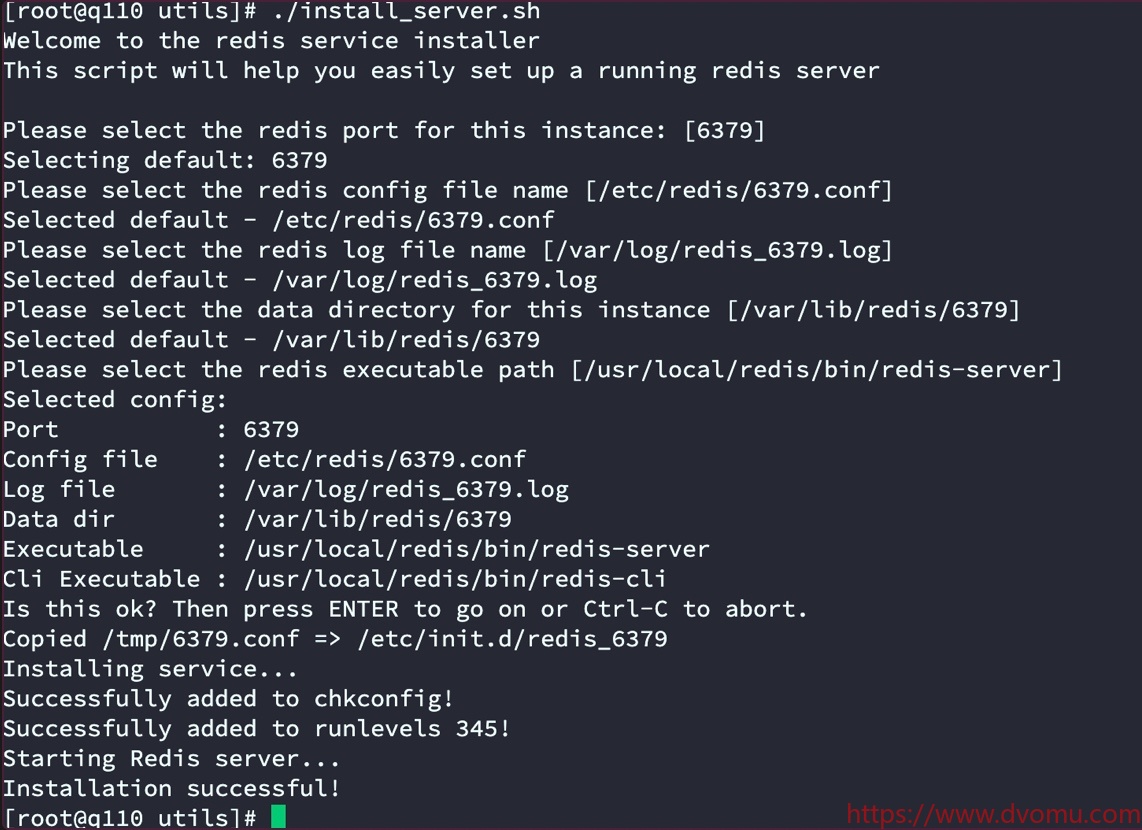
执行完成后redis实例默认已启动,配置及日志文件路径上图也有输出。
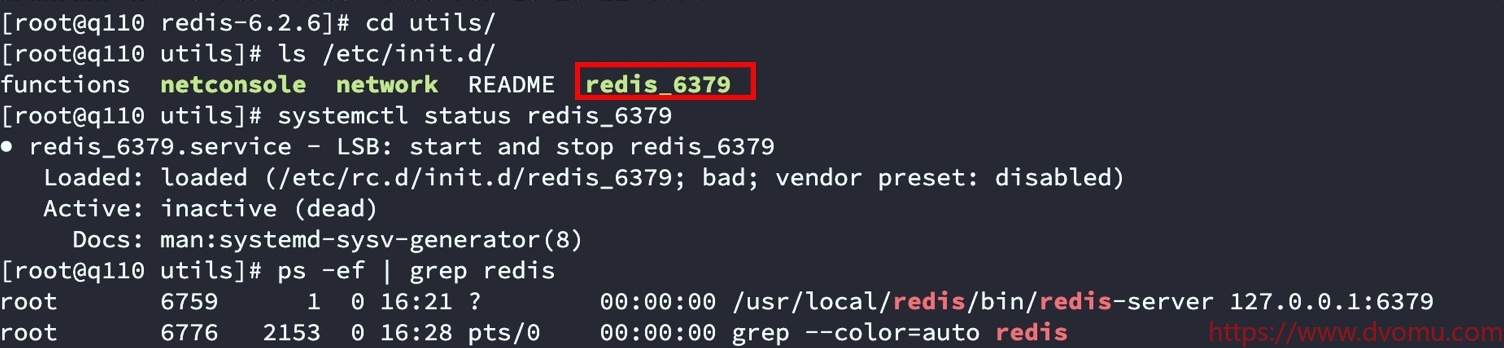
允许外网访问
实现方法:可以通过简单配置,允许外网进行访问。
这里有一个限制:Redis版本问题,版本过低不行。
在Redis3.2版本之后新增了protected-mode 配置,默认是yes,即为开启。
protected-mode设置为不同值时的效果如下:
 注:如果想实现在外部访问服务器中的Redis,除了需要设置 protected-mode no 之外,还需将redis.conf 文件中的 bind 127.0.0.1注释掉。
具体实现步骤
1、找到自己服务器中redis的配置文件redis.conf 文件
如果不清楚,可执行 find / -name redis.conf 如果是你通过yum安装的redis,则redis的默认配置文件为:/etc/redis/redis.conf
2、如果你的服务器开启了防火墙策略,此时需要配置防火墙,开放对应的redis端口,该端口为你启动的redis配置文件中对应的端口号
# 1、开放redis的6379端口【假设redis端口为6379】
firewall-cmd --zone=public --add-port=6379/tcp --permanent

# 2、重启防火墙使得配置生效
systemctl restart firewalld

# 3、查看系统所有开放的端口
firewall-cmd --zone=public --list-ports
- 关闭再重启
ps -ef | grep redis
# kill 掉进程,再启动
路径/redis-server
修改密码
- 打开redis.conf 找到 关键字【requirepass foobared】
# The requirepass is not compatable with aclfile option and the ACL LOAD
# command, these will cause requirepass to be ignored.
#
# requirepass foobared
- 注释打开 将
foobared修改为设置的密码
# The requirepass is not compatable with aclfile option and the ACL LOAD
# command, these will cause requirepass to be ignored.
#
 requirepass 123456
- 关闭再重启
ps -ef | grep redis
# kill 掉进程,再启动
路径/redis-server
- 连接方法
- 连接时输入密码:
[root@localhost bin]# ./redis-cli -a 123456
- 先连接再输入密码:
[root@localhost bin]# ./redis-cli
127.0.0.1:6379> auth 123456
加入systemctl服务
编辑.service文件
vim /lib/systemd/system/redis.service
加入下面内容
[Unit]
Description=redis
After=network.target
[Service]
Type=forking
PIDFile=/var/run/redis_6379.pid  //注意
ExecStart=/usr/local/redis/src/redis-server /usr/local/redis/etc/redis.conf //注意
ExecReload=/bin/kill -s HUP $MAINPID
ExecStop=/bin/kill -s QUIT $MAINPID
PrivateTmp=true
[Install]
WantedBy=multi-user.target
ExecStart的路径替换成你自己的安装路径, pid路径和 redis.conf里面的路径保持一致
重启systemctl
systemctl daemon-reload
systemctl命令
systemctl enable redis.service  //加入开机启动

systemctl start redis //开启redis服务

systemctl status redis  //查看redis运行状态
配置主从复制
从节点开启主从配置,有 3 种方式:
- 配置文件:在配置文件加入 slaveof < masterip > < masterport >
- 启动命令:redis-server 启动命令后加入 –slaveof < masterip > < masterport >
- 客户端命令:Redis 服务器启动后,直接通过客户端执行命令:slaveof < masterip > < masterport >(亲测有效!)
本文通过常用的配置文件加入。 Master节点修改配置: 修改/etc/redis/6379.conf 中的bind,默认只能本机访问,需添加2台salve 节点ip。 Slave节点修改: 修改q111和q112两台都需要修改
- 修改/etc/redis/6379.conf 中的bind,默认只能本机访问,需添加2台salve 节点ip。
bind 192.168.88.100 - 配置主节点IP和端口
bash
vi /etc/redis/6379.conf
# 修改,如果主节点存在用户名和密码也需要配置上
replicaof 192.168.88.110 6379
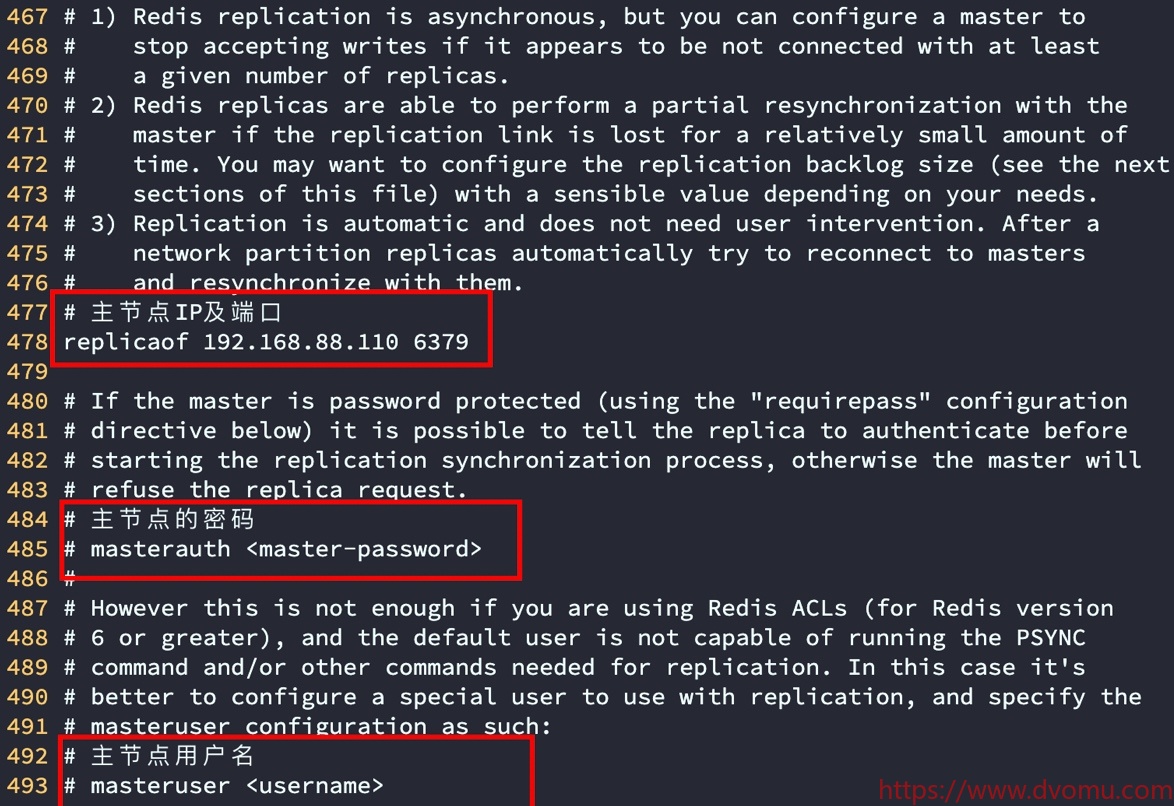
重启3台从redis服务
systemctl restart redis_6379
验证
通过查看Master Redis日志可以看到已经将RDB同步到磁盘并发送给Salve节点。
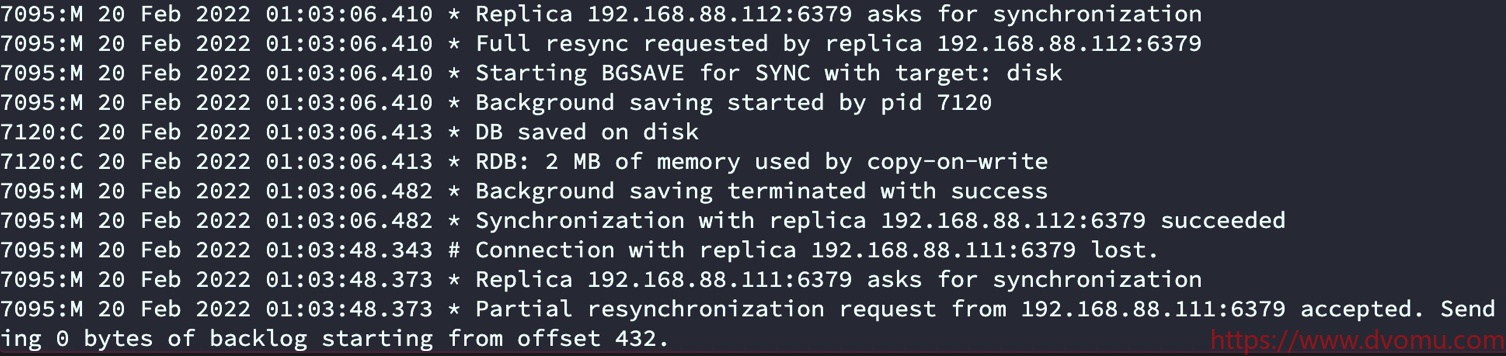
查看Slave Redis日志可以看到已经从Master节点将RDB同步到磁盘
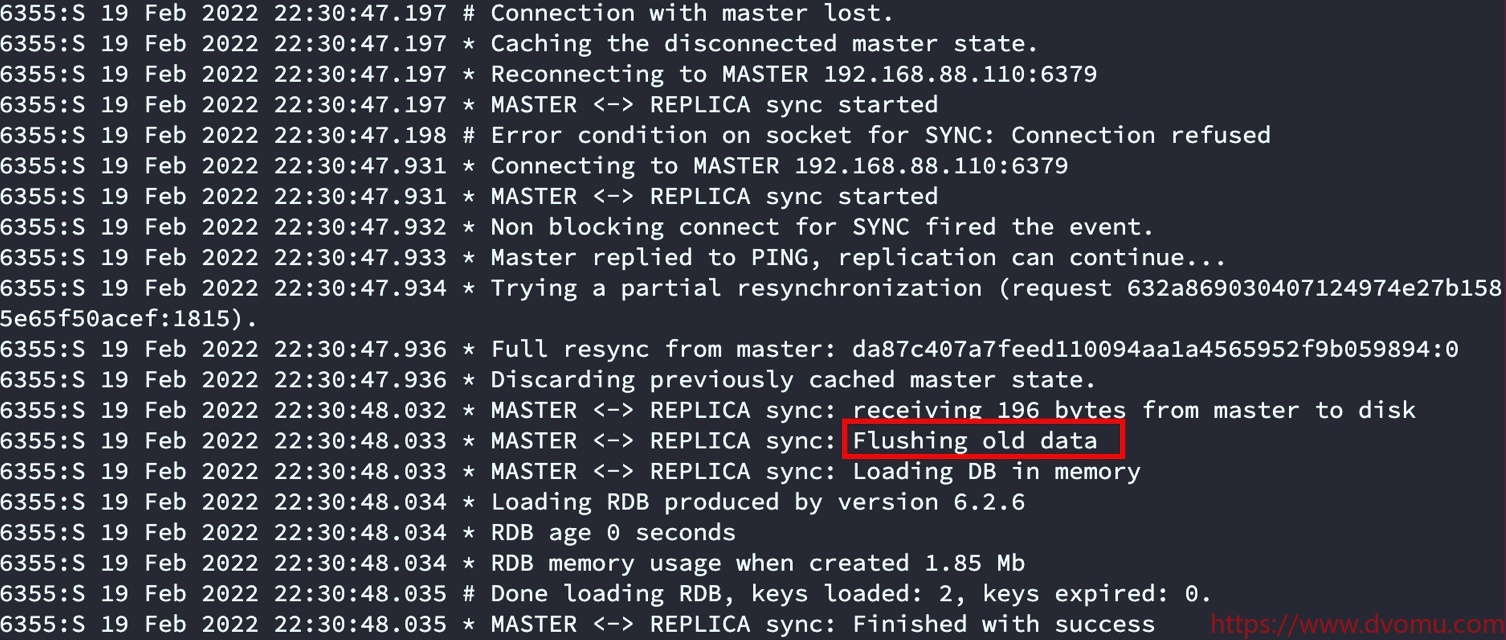
注意: Slave在同步Master节点RDB数据时会先删除自己的RDB文件。
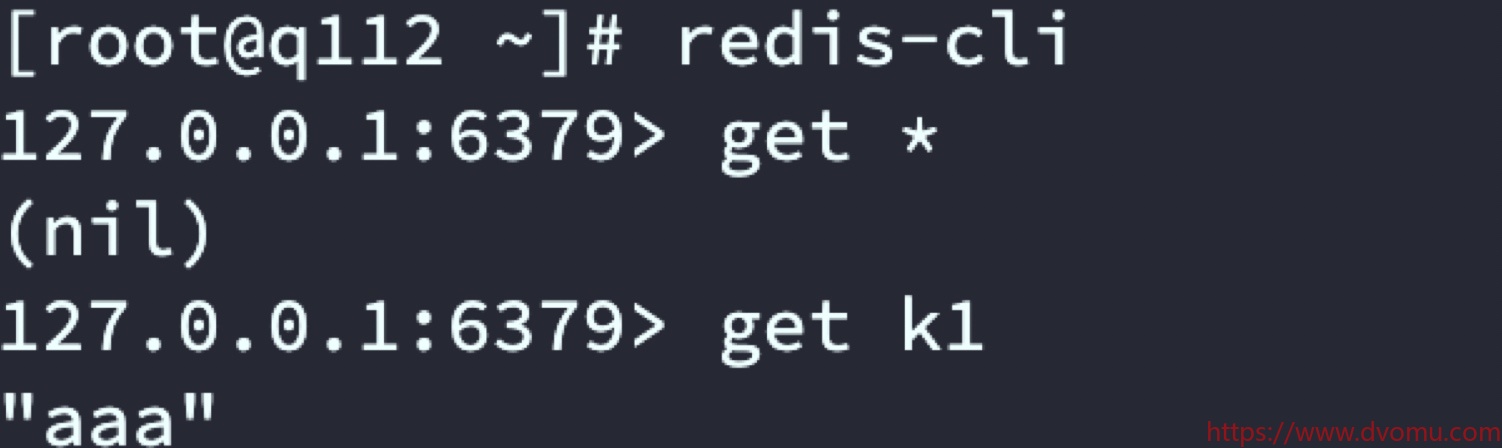
通过客户端连接后在Master节点set 一个key 后 在Slave节点get 该key可以看到数据已经同步。
q112
 q111
q111

至此,主从复制已配置完毕。
搭建遇到的问题
搭建完后 ,如果主节点查看不到从节点 可以使用命令 telnet masterip 6379
如果出现

那么需要将主节点的配置文件 protected-mode置为no